Pasta Easter Eggs
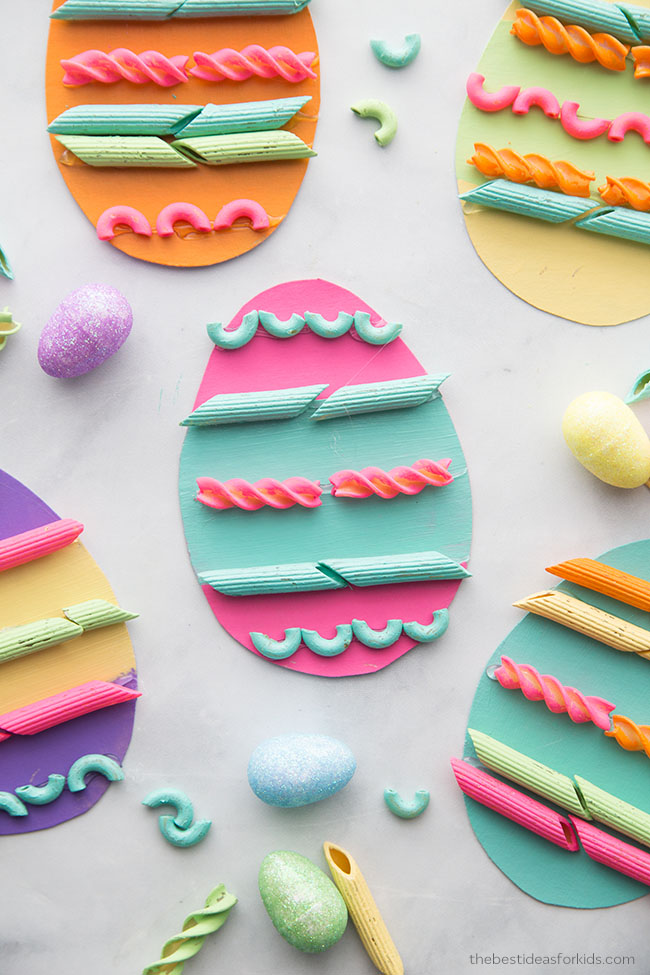
Decorate your Easter eggs with colorful pasta! This craft is not only fun, it’s super easy, so your little ones can do most of the work. Every egg SHOULD be different, so get creative, there’s no way to decorate wrong 🙂
Decorate your Easter eggs with colorful pasta! This craft is not only fun, it’s super easy, so your little ones can do most of the work. Every egg SHOULD be different, so get creative, there’s no way to decorate wrong 🙂
Supplies:
- Cardboard or paper for eggs
- paint or markers
- pasta- penne, fusili, etc
- glue
Directions:
- You can either paint the pasta all together in advance or let your kids color in the pasta with markers piece by piece. If you choose to paint the pasta, put it into different zippered bags and then put different color paint in with each bag. Squish pasta around in bag to coat. Lay out to dry.

Use the template below to trace and cut out your eggs—if you have it, use cardboard to create a sturdier egg.
Paint or color your eggs. You can keep them all one color, or create designs. Use the templates below (they can be glued onto your cardboard) or create your very own designs.
If you used paint, let your eggs dry.
Glue on your pasta!